New approaches to familiar challenges
 While every property has its own history and quirks, in my experience, there are a number of challenges that tend to pop up more frequently than others. Having a solid go-to plan to tackle these issues at the start of a job is key to creating a finished look that the customer loves when the job is done—and for years afterward.
Here’s a look at five prep issues and the methods we currently use to address them at my Concord, MA-based painting company H.D.F. Painting, Inc. These approaches have evolved over time as new products have come to market and we’ve had a chance to witness how each holds up over time—and to the weather and moisture levels in our region.
CAULK
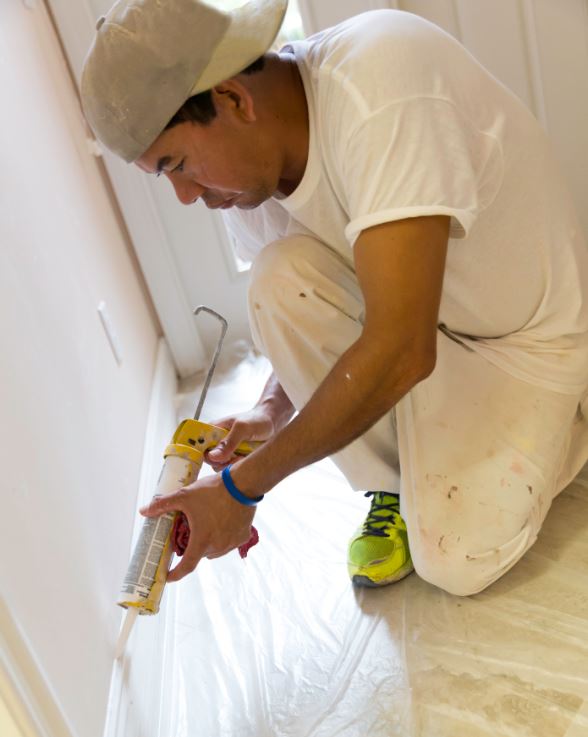
I once met an old-time Vermont painter who really does not like to use caulk. His philosophy is that the carpenter should be skilled enough to make perfectly connected joints. Unfortunately, in my experience, not all carpenters are equally skilled and a lot of the wood used these days is new-growth stock that is green and full of moisture. When it dries out, the joints are very noticeable. Personally, I don’t know how you get away without caulking, but caulking has to be exact because you can’t sand it. So if you don’t wipe a smooth, clean edge with a wet rag, you are creating a huge problem that no coat of paint can hide.
To smooth caulk, you need a bucket of water, a rag, a caulking gun (dripless are best), a good caulk product and your index finger. We prefer White Lightning BOLT. Cut a small, diagonal line on the tube of caulking; the smaller the better. Carefully squeeze out a line of caulk onto the area which you are working. Wrap your index finger with a rag and dip it into the water. Now, follow the caulk line with your finger to create a smooth, straight and consistent finish. But remember, caulk is not sandable so be sure to wipe off any excess from the surface.
WINDOW GLAZING
Nothing looks nastier on a beautiful paint job than window glazing falling out of the sash. Besides being unsightly, energy conservation is a serious issue with improperly or poorly glazed windows.
Whether you choose to re-glaze on site or remove and work on windows at your shop, the re-glazing method is similar.
Begin by using a painter’s putty knife to scrape out all glazing. I can’t stress enough the need to approach the dig with great care so as to avoid breaking the glass. Do your best to remove as much of the old glaze as possible but if you can’t get it all without risking the glass, don’t stress. It is alright to leave some old glaze in the sash. Once you’ve removed as much as you can, the next step is to prime the wood sash. We use either Zinsser’s B-I-N Shellac-Base Primer or linseed oil. After the primer is dry, we apply Sarco Dual Glazing Compound, which we prefer because it’s easy to use and holds a tight bond to wood. After the glazing has cured, we paint the windows; then when the paint has dried, we clean the glass.
ROT REPAIR
Our general rule of thumb is any rot area 6″ or less can be repaired with epoxy. Anything larger needs to be replaced with wood or a composite. Our epoxy of choice is Abatron’s LiquidWood & WoodEpox Wood Restoration Kit.
The kit comes with equal volumes of LiquidWood & WoodEpox. When the LiquidWood A & B portions are mixed together and allowed to set, they form a consolidant that binds with the dead and decayed wood.
This forms a great foundation and primer for the next application, WoodEpox.
When the WoodEpox A & B portions are mixed together, they form a paste for filling holes and gaps in the wood. A couple of nice aspects of WoodEpox are that it’s shrink-free and can be used in any thickness to replace and repair wood. Plus, it bonds permanently and can be painted, stained, sanded and worked like wood.
Pro Tips
When using the LiquidWood & WoodEpox Wood Restoration Kit, wear plastic disposable gloves while handling both components. Acetone and Wil-bond both work well to smooth out the products and clean tools. Note that both products go a long way so start with two golf-ball-sized amounts when mixing together. I also recommend getting the ‘squirt’ attachment for the LiquidWood, as it can get very sticky.
PRIMING BARE WOOD
As most pros know, peeling paint on exterior substrates is rarely the result of bad paint. Typically, the major problem is either caused by an unsound substrate, excessive moisture, a dirty surface—or is an internal moisture barrier issue. Old-school painters swear by a good-quality oil-based primer on bare wood. While this is a great approach on really dry, bare wood, it can be problematic in high moisture and mildew areas.
Because we’re not in an arid climate, we’ve landed on a different approach that we’ve tested over the years with great results.
For bare wood, we apply one clear coat of C2 Guard, a nontoxic, flexible polymer that gets absorbed deep in the surface of the wood to form a protective barrier. We top that with a high-quality, 100% acrylic exterior primer. We prefer C2 Paint’s C3000, a pure acrylic emulsion primer that, for our money, seals and blocks stains really well. We then finish the exterior with two coats of a finish paint.
CRACKS IN PLASTER
We’ve all seen these cracks in older homes with old horse-hair plaster, and in newer homes when the moisture in the framing dries out and causes movement—and small, hairline cracks on walls and ceilings. Even though the causes and age of the issue can vary dramatically, the repair approach can be the same for both situations.
When we first started in this business back in 1984, we would dig out the crack, apply new plaster, tape, and in some instances, use ‘buttons’ (the quarter-sized metal circles that are used to hold plaster in place) to level out the bulges in the old plaster. Over time, we found the cracks returned, even through fiberglass tape. We have since adjusted our approach and now our method includes the following steps:
- Dig out the crack with a painter’s putty knife
- Apply a thin bead of White Lightning’s BOLT Quick Dry caulk
- After the caulk has dried, skim the crack with a layer of DuraBond 20, followed by an easy-sand joint compound; feather it out to form a flush, flat surface
- On top of the layer of joint compound, spray a thin coat of Good-Bye Cracks (made by Goof Off) as an added protective coating
- After the surface has dried, spot prime and apply the finish coat(s)
Similar to many trades, painting is all about problem-solving in the moment. Most of what we learn is from hands-on experience, trying different ways to complete a task in the most efficient, effective manner. Over time, you may find different methods need tweaking to produce a perfectly executed, long-lasting paint finish. A good paint retailer will point out new products and make recommendations. Be sure to ask questions, try new things, keep an open mind, and continually work on perfecting your craft.
________________________________________________________________________________________
 Daniel Frost is the owner of H.D.F. Painting in Concord, MA. Opened in 1984, the company specializes in residential and light commercial work. They take pride in delivering on their motto, “The Art of Fine Painting,” on every job. HDFPainting.com