Q: How do you maximize the life and performance of a brush?
 A: Without exception, any professional will tell you that their painting tools are critical to performance and production. Your paintbrush is an extension of your hand leaving the last touch to the home or business. Once you land on a valued tool, it becomes an investment and worthy of the effort it takes to preserve it.
In my opinion, organization is the first step to preserving a brush. A well-chosen toolbox or tote can keep your brushes not only organized, but protected. Depending on whether you are an interior or exterior painter (or both), you can organize your brushes based on size, application or by paints—your choice. The main emphasis is keeping them in a system for easy on-the-job access.
Not surprisingly, cleanup is also critical to extending the life of a brush. If you use an oil-based paint or stain, paint thinner—like a Xylol Xylene—is an obvious must. My preferred method involves dipping the brush into a jar of the thinner, then spinning the brush to shake off the paint and thinner. Repeat this process until all paint has released from the filaments, periodically refreshing the jar with clean paint thinner. Once the thinner runs clear, spin the brush handle in your palms to shake the remaining liquid out. Protect the brush with a cover or keeper until you can hang it to fully dry.
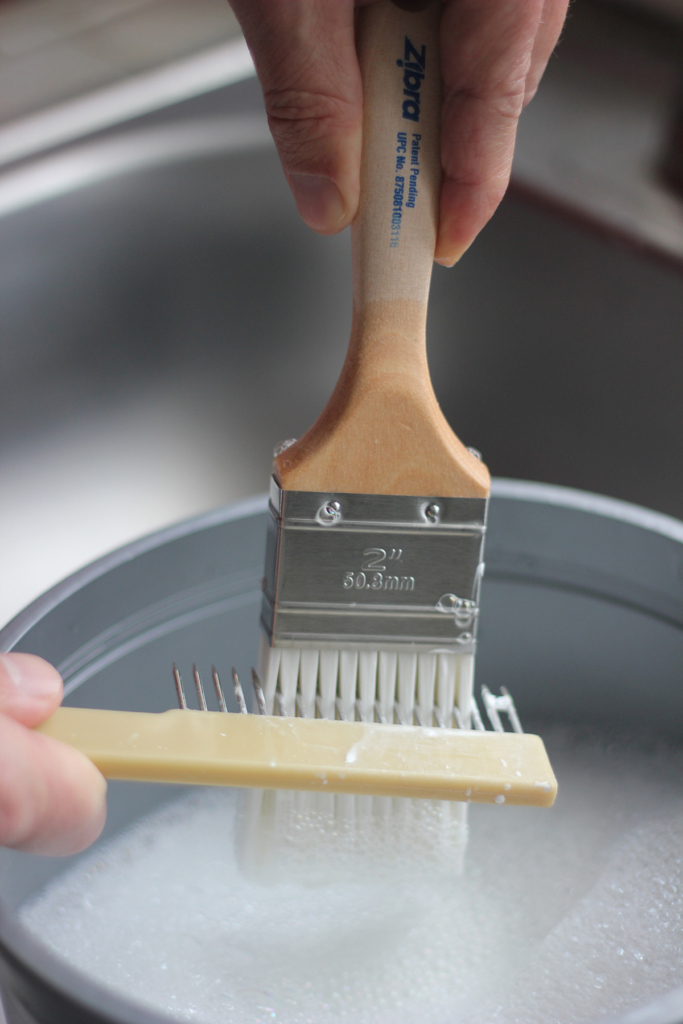
While the range of water-based paints is pretty wide, the requirements of cleanup aren’t so varied. Most brushes can be properly cleaned with water and detergent (a standard dish detergent will do). After excess paint has been removed (I like to use the inside edge of the can followed by ‘emptying’ it on a piece of clean cardboard), dip and swish the paintbrush head in a bucket of soapy water until fully absorbed. Then lift the brush up and use a brush comb to gently comb, from ferrule to filament tips, down toward the detergent-water solution. You can alternate between brush comb and your fingers to squeeze out the water and paint but, for me, a brush comb is a must. It cuts the cleaning process in half and adds longevity to the brush because it gently separates the filaments so you can get a deep clean. Next, hold the brush head under a smooth flow of warm, running water with bristles aimed down. Use the brush comb to separate the filaments and release the paint. Continue until the water runs clear. Lastly, spin the brush with your hands in a bucket or in an open area to release the remaining water.
Once the brush is clean, many professionals like to protect their brush with a brush keeper, readily available at paint and big box stores. Alternatively, you can cut different sizes of thin, sturdy corrugated cardboard and fold them in the shape of the brush, allowing the folded part to sit just over the tip of the brush; use rubber bands to hold the corrugate over the brush head, keeping the filaments in place.
If you have to temporarily lay a brush down on the job without properly cleaning it, you can protect it by wrapping it with a cheap grade of cellophane. It clings to the brush and, if sealed well, will prevent drying. We recommend keeping a 5-gallon bucket nearby with a removable rod at the top. Hang wrapped brushes on the rod to keep the paint flowing toward the brush head where it belongs and not toward the ferrule.
One last organizational tip: hang any brushes you’re not using on a given job back at your shop. This will lighten your load and ensure brushes don’t endure any unnecessary abuse.
__________________________________________________________________________________________
 Having grown up as a contractor’s son working summers under his dad’s guidance, it’s only fitting that LANE BALL now works as director of marketing and product development for Zibra, LLC. His creative and problem-solving abilities lend well to the continual process at Zibra as they innovate, design, develop and test quality paintbrushes. EnjoyZibra.com


