UNLUCKY 13: Common exterior prep mistakes and how to avoid them
 No matter what finish coat you ultimately apply to an exterior job, the prep work will determine whether it lasts—or fails prematurely. “Every building is different, and you have to look at each surface individually,” says Dave Carhart, owner of Star Painting & Wallcovering in Collegeville, PA. “Today’s exterior paints are pretty forgiving, but if you don’t do the prep correctly, it won’t matter if you buy the most expensive premium paint out there.”
While exterior prep is simple in principle and process, there are a number of common mistakes that pros need to avoid in order to execute the best possible final paint job and ensure a durable finish that holds up to the elements and over time:
#1: NOT IDENTIFYING WHAT YOU’RE PAINTING OVER.
If you haven’t seen a bucket of the previous coating with your own eyes, don’t assume you know what it is—and don’t take the homeowner’s word for it. “I’ve seen a lot of mistakes where people assume it’s a paint when it’s really a solid stain or vice versa,” says Mark DeFrancesco, owner of MDF Painting & Power Washing in Greenwich, CT. “They’ll have quotes from guys coming in who planned to use the wrong thing, and the customer had no idea until I asked them about it.” Even though you might be able to tell from how the previous job has aged—paint will obviously have a tendency to peel, whereas solid stain will oxidize and fade—the only way to know for sure is to send a test chip to a manufacturer’s lab. “That’s what you’re paying for when you buy that gallon of paint,” DeFrancesco says. He recommends always covering paint with paint, and solid stain with solid stain—unless you’re willing to prime the entire house.
#2: IGNORING AN UNSOUND SUBSTRATE.
“Probably the most common mistake I see in the field is that people paint over pulpy wood that isn’t really solid anymore,” says Carhart. “Sure, a latex paint will bridge it, but it will eventually bubble. You absolutely have to bring this to the customer’s attention at the estimating and bidding stage.” To help identify wood that should be replaced, DeFrancesco recommends using moisture meters in the field to test areas that have cracked, peeled or bubbled in the past. “Generally speaking, anything above 11–13% is trouble and should be replaced,” he says. Synthetic woods can be a smart solution for problem areas, but it’s also essential to make appropriate flashing repairs where water is feeding improperly.
#3 OVERLOOKING INTERNAL ISSUES.
In some cases, substrate issues can actually be coming from the interior of the home. “You’ll often see houses where the paint is fairly stable in most areas, then there’s a section that’s very clearly delineated where it’s peeling,” says DeFrancesco. “For example, if a home is older and there’s a bathroom that’s getting a ton of use—even if they have a vent, there can be more moisture being drawn out of that wall than the adjacent master bedroom. The only way that’s going to get solved is with an insulation fix, and the painter has to know enough to tell the homeowner that’s why this is happening there.”
#4 OVERPOWERING WITH YOUR PRESSURE WASHER.
With the substrate addressed, it’s time to clean the surface. While pressure washing saves lots of man-hours, it requires the right approach. “The biggest mistakes are not using the right tip and getting too close to the siding, gouging the wood,” says Conor O’Keefe, owner of O’Keefe Painting in Minneapolis. “If the siding is peeling back, we’ll use a turbo nozzle to agitate the surface and get that paint off. At the same time, it’s also really aggressive, so you have to get the skill down as far as how to use it right because otherwise, you’ll be ripping the wood right off.”
#5 SKIMPING ON SCRAPING AND SANDING.
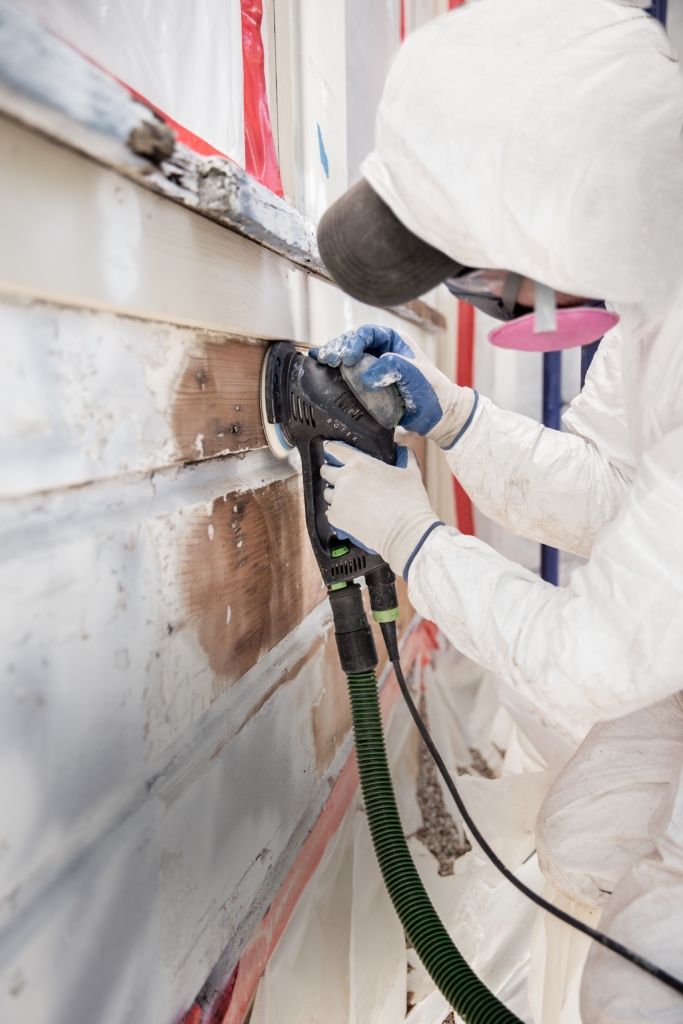
Thinking that you can get away with just scraping or sanding is a dangerous shortcut. “One of the reasons you scrape before you sand is so you don’t have to get really aggressive with sanding, which will pit or gouge the surface, and it won’t look very good,” says O’Keefe. “With scraping, you want to get to the point in which the paint stops peeling. You also want to pound in loose nails. What you’re left with is a lip where the substrate is raw, but the old coating is still there. From there, you feather-sand to remove gray deadwood and make the edge less noticeable. Then, when you use a high-build primer, it locks down those edges.” He notes that 100-grit sandpaper is sufficient in most cases, since fine finishing isn’t necessary for thick exterior coatings—and, in fact, if a surface is too smooth, the primer and paint will have more difficulty adhering to the surface.
#6 NOT CLEANING OR RINSING PROPERLY.
Different pros take different approaches to the process of removing dirt, mold and mildew. But they all agree on one thing: “It’s a big mistake not to thoroughly clean all your surfaces, especially in the high areas that are hard to get to,” says Carhart, who uses a blend of detergent and bleach. “If you’re painting over loose paint, dirt or mildew, the primer is not going to grab.” DeFrancesco mixes seven cleaning solutions in-house of varying strengths, while O’Keefe generally uses Simple Green down streamed through a pressure washer, with trisodium phosphate (TSP) added when mold or mildew are an issue—making sure to let it sit on the surface for a while to do its job. After cleaning, the back-rinsing step is equally important: Watch to make sure that water is coming down as clear as possible, because cleaning-agent residue could harm the durability of the paint job.
#7 RUSHING THE PRIMER.
There are two aspects here that can result in mistakes. First, not allowing the house to dry sufficiently after being pressure washed. “Every house is different, and it depends on the shade and humidity level,” says O’Keefe. “Usually, it’s within a day or two before we can start working. We bring moisture meters with us and aim for under 15%, which is what most paint manufacturers say on their technical data sheet.” Second, there’s the drying of the primer itself, which might be 24 hours or more with an oil-based primer, or as fast as 90 minutes for some other products. “You always need to look at the specs of the primer and how long it needs to dry before it can be painted,” says Carhart. “There are so many different primers out there, you know what you’re using and whether it can have a faster application or needs a slower application. Particularly with oil-based primers, you need to make sure they’re absolutely dry.”
#8 UNSAFE LADDER PRACTICES.
Most pressure washers come equipped with a 4′ wand, which saves labor at ground level, but can be precarious at the top of an extension ladder. “With the pressure of the wand, it’s hard to have one hand holding onto a gun and one hand holding onto a ladder,” says O’Keefe. “If you have the tip attached directly to the gun, you don’t have as much reach, but it’s a lot safer, which lets you move faster.”
#9 MAKING ASSUMPTIONS AT THE ESTIMATING STAGE.
Even the most experienced estimator doesn’t have a crystal ball. “The truth is, pressure washing reveals a lot more than what you can see looking from the ground,” says O’Keefe. “It’s tricky, because customers don’t like the unknown, particularly if the price could vary by several thousand dollars. So, if we see a house that’s peeling pretty bad, we might allocate a little bit more time just to make sure that we can prep it right. In a really bad situation, I might tell the customer we’re going to have a minimum and maximum, and we’ll reevaluate the situation after we pressure wash to decide.”
#10 CAULKING WHERE YOU SHOULDN’T.
On occasion, a homeowner may request that you caulk the underside of lap siding because they think they want the whole house sealed up. “That’s when you have to advise them that, as long as it’s an area that water can’t get in, you want the house to be able to breathe,” says O’Keefe. “Otherwise, the only way for moisture to escape is by pushing its way through the coating. In addition, caulk in those areas is eventually going to fail and look really bad. Even with Hardie board siding, we don’t caulk the butt joints because there’s so much expansion and contraction.”
#11 USING CHEAP CAULK OR FILLERS.
“My rule of thumb is that you want to use ultra-premium products,” says DeFrancesco. “That makes a big difference on the exterior, because the surfaces are expanding and contracting a lot more than they do on the interior. If you’re doing a 3,000-sq-ft home, you might use 20 tubes of caulk. At $4 more per tube, that’s not even $100 more on the job, but it could be the difference between lasting three years and 10—which is a major labor-cost benefit for that homeowner.” Similarly, DeFrancesco depends on two-part fiberglass Bondo products from 3M that harden quickly, don’t sink, and are more durable through temperature extremes. And, as with primers, make sure that you give caulks and fillers sufficient dry time before applying your first finish coat.
#12 FAILING TO TRACK PRODUCTIVITY.
Given that prep work can often be double the amount of time spent on the paint application, it’s critical that you know your numbers. “In particular, sanding is the biggest gray area, and it’s taken us a long time to determine exactly what our work rates are,” says DeFrancesco. “Most people will start with national averages from PDCA, but I think it’s smart for painting contractors to track the amount of productivity they get in terms of sanding and other prep components. Once you really know what you’re performing in one man-hour, you can convey that confidence to the customer and break it down for them.”
#13 LACK OF A SYSTEM.
As much as you trust your crew’s decision-making capabilities in the field, a successful exterior prep job requires everyone to be on the same page. “You need to be very clear in your pre-job meetings about what your scope of work is,” says DeFrancesco. “Rather than just saying we’re going to sand and remove all loose and peeling paint, you can go one step further and say this side of the house is 50 man-hours, this side of the house is about eight man-hours, and list the main areas of focus or trouble spots.”
While most homeowners may not know much about painting, they’ll be familiar with the old adage that prep is the most important part of any job. Avoid the mistakes listed above and you’ll not only prep the way to a longer, lasting finish, you’ll also ensure happy customers and the potential for more referrals.


