 Jason Lunn is a senior application engineer for 3M and provides training and education on the company’s wall repair and safety products.
Q: Is there a faster and easier way to repair a hole in drywall?
A: We’ve all tried the various traditional methods of hole repair such as a mesh screen, a California patch, or adhering wood supports to the backside of the wall to accommodate a replacement patch of drywall. These methods are often time-consuming, since they may require measuring and cutting of drywall patches, applying layers of mud over multiple days and, of course, lots of sanding (which we all know is the worst part). Another drawback to these methods is that if you don’t have a lot of experience with large-hole repairs, you may not feel confident enough that you’ll be able to create a professional-looking repair that blends in seamlessly when it’s completed.
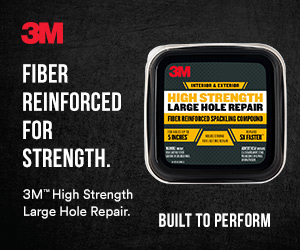
With that said, there is actually a faster, more efficient method out there for a large-hole repair (and you only have to sand once!). Not only that, it allows you to get a flush finish to the wall for a professional look, rather than having a large bump on the wall that you need to blend in with the existing wall. This large-hole repair method involves the use of a unique repair plate. It’s similar to having wood supports behind the hole but uses adhesive, rather than screws, to hold the plate in place. The plate covers the entire area of the hole behind the drywall, allowing you to fill in the hole completely with repair compound rather than another piece of drywall, eliminating the need to measure and cut out a replacement piece. This repair plate, and everything else you need to repair a large hole (3″–5″ diameter), can be found in 3M’s High Strength Large Hole Repair Kit.
What’s in the kit and how it works
The 3M kit, which can be found at local hardware stores or online, includes fiber-reinforced spackling compound, a self-adhesive repair plate, a putty knife, fiber tape and a sanding pad. Here’s how it works. First, prepare the wall and hole by removing any broken drywall, dust and loose debris from both the inside and outside of the wall. Then, sand down the edges of the wall hole, making sure to remove all the loose paper from the surface.
Next, you will need the repair plate. This plate is designed to curl in one direction but not the other, allowing you to curl it up, push it through the hole, and then pull it so that it unfurls and adheres to the backside of the drywall. If the repair plate doesn’t fit through the hole, you can easily trim it down as needed with a utility knife or scissors. Once in place, this plate creates a flat surface behind the hole that you can now fill in with the spackling compound. One of the real time-savers to this method is that you can fill the entire hole so that it’s flush to the surface of the wall. There’s no need to add layers of mud on top of the existing wall surface that must be carefully feathered out a couple of feet in all directions from the repair. Once the compound is dry, you sand it once so the repair is completely flush with the wall, then prime and paint. There you have it: a nice, flat, professional-looking hole repair that won’t shrink, crack or sag.
Effective and versatile
This is a quick and easy method that eliminates many aspects of traditional hole repairs and also drastically decreases the area of the wall affected. The 3M kit covers everything you need to repair a hole and works for both interior and exterior repairs. Also, because the repair compound is lightweight, you can even repair a hole in the ceiling, such as that from a recessed light or ceiling fan. If you have never attempted to repair a hole with this method before, give it a try the next time you need to repair a hole in drywall, or even stucco or wood, and see for yourself how well it works.


